


How to make a prototype and test it?
How to make a prototype and test it?
Do you want to make a prototype but you do not know exactly which tool you should use? You are at the right place. In this article, we will compare the different tools to make prototypes according to your needs.
In order to explore this topic further, we have talked with two UX experts who shared their recommendations and good practices with us during a webinar. Which prototyping tool to choose? Why test your animated prototypes? These are all questions that we answer during our webinar.
Table of Contents
What is a prototype?
Very simple, in the context of UX, a prototype is actually a group of interactive mockups linked together. This prototype is a dynamic representation of your future application or web site.
There are two different kinds of prototypes:
- The low fidelity prototype. The latter is not completely finished and has less content. Generally it has an unfinished UI (Non uniform colors, black and white etc)
- The high fidelity prototype. This prototype is characterized by its perfect fidelity to your future site or application, with a complete UI. In these kinds of prototypes you will find all the features of your future interface.
What are the prototyping tools available?
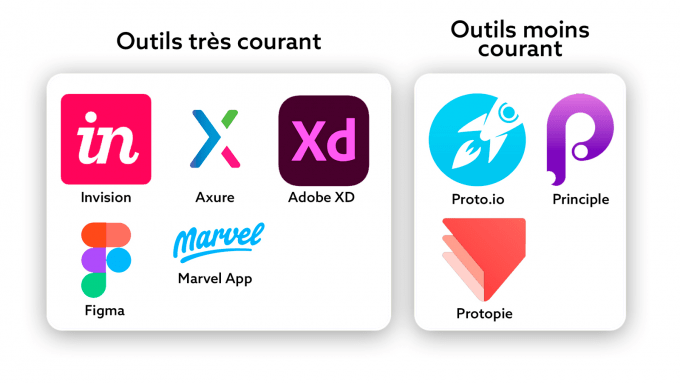
When it comes to prototyping tools, you have a lot of choices. There are a multitude of solutions available to create your prototype. First of all, you will find the industry giants such as Adobe XD, Invision or Figma but also other tools that are less known such as Protopie or Proto.io.
Each one of these solutions allows you to build complete prototypes, there is no question about that. What differentiates these solutions is rather the level of the tool’s collaboration, their price or the level of realism of the animated prototypes.
On our side, in order to benefit from sufficient resources and especially from a large community, we recommend you to go for the most commonly used tools:
- Figma
- Invision
- Axure
- Adobe XD
- Marvel App
Which tool should you choose to make your prototype?
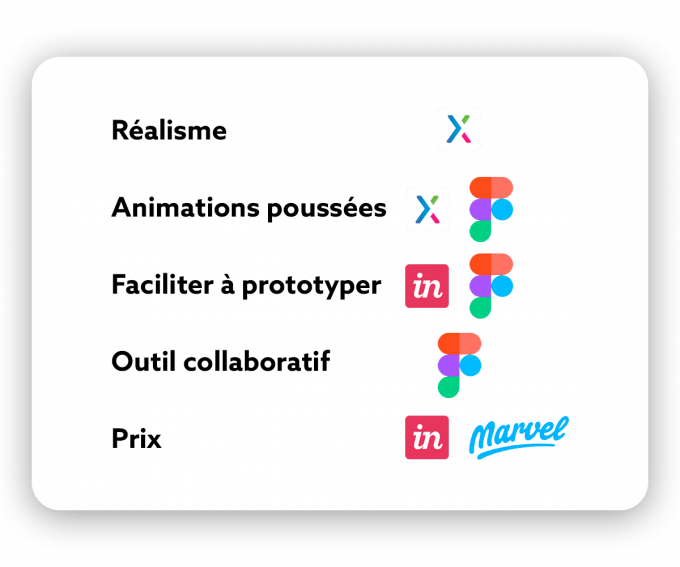
Taking into account all the prototyping tools available on the market, your choice will be based on your criteria. If, for example, you want to focus on the realistic side of your prototype, Axure will definitely be the best option for you.
If you prefer a solution that is easy to use, we recommend you to use Figma. Same thing if you prefer a collaborative online tool or that you want to create complex animations, Figma is made for you. The only issue with this tool is the management of high quality images. It is not uncommon to have to wait one or two minutes to load a page of your prototype.
Regarding the price, Marvel App and Invision are the prototyping tools to go for if you are looking for an affordable tool. These two solutions offer affordable prices for very high quality.
Once again, prototyping tools are in full development and therefore evolve very fast. Do not hesitate to keep yourself informed about the new updates and changes of the tools.
Test your prototype
What for?
It is beneficial to test your prototypes rather than mockups or wireframes because the latter are more accurate and represent your future interface better. This way, users will project themselves more easily and thus generate richer and more relevant feedback.
Compared to sites or applications under construction, testing prototypes gives you more flexibility. Optimizing your interfaces before they go into production is less costly and less time consuming to do.
The reason is pretty simple, on the one hand, it takes less time to re prototype an animated mock up rather than correcting the code. And on the other hand, an UX/UI error on a site that is under construction can make you lose money, while a test on your prototype would have avoided these kinds of issues.
How to test your prototype?
- Journey definition
- Content selection
- UI creation
- Minimum resolutions
Journey definition
First of all, it is important to clearly define the journey that should be followed by the testers. In order to do this, we recommend you to define your ideas beforehand and to build your journey according to what you want to know.
Thus, if you want to study the usability of your shopping cart, it may be relevant to prototype the whole shopping journey (home page, product sheet etc) The goal here is to give context to the users and allow them to project themselves.
Then, once the journey has been defined, you need to focus on the navigation. For that, define which buttons have to be made clickable to allow the navigation between multiple pages. You should also think about the elements that you should animate, such as sliders for example.
Small tip: Warn your testers that not everything can be clicked on, this will prevent them from getting stuck with an unresponsive CAT.
Selecting the content
Selecting the content is a very important parameter to take into account when doing your prototype. In fact, it is the content that will allow the users to project themselves in the test.
It is not necessary to offer the definitive content during the test. However, the latter has to be coherent and readable. Otherwise, the users will take time on it and imagine it is a bug. For example, lorem ipsum should not be used. Several testers feel lost when you use it and have a tendency to make the following comment: “why is it in Latin? I do not understand, it is weird ''.
The images are another variable that should also be considered. We advise you to choose high quality images that are above all consistent with the rest of the content. If the users see an inconsistency or badly chosen content, the latter will focus on it and provide feedback only about this subject. This kind of mistake can ruin your test.
UI Creation (or not)
The level of realism of the prototype will depend on your test’s objective. For example if your test will focus on the UX, which means the navigation or the structure of the information, the prototype will not necessarily need to have a well designed UI.
However, if your goal is to evaluate the overall perception of your prototype or the attractiveness of your interface as part of a UI redesign, then, we recommend you to propose a high fidelity prototype.
Minimum resolutions
Another point that you should check when creating a prototype: is the resolution of the latter. In fact, due to the multiplication of screen resolutions, it has become compulsory to create responsive prototypes. Only that, this is not enough, you will also need to create mobile and desktop versions so that the designs adapt to any type of screen.
In addition, in order to verify the display of your prototype we recommend you to try the journey on different devices before each test. Do not hesitate to try out your prototype on several smartphones and computers with different screen sizes.
Our tip: We recommend you to use minimum resolution on your prototype. Which means, 1334*750 pixels for smartphones and 1024*768 pixels for computers.
 Published by : Julien Hennig - Categorised in: UI / UX (Design & Conception)UI / UX (Design & Conception)