
Set up your microphone
PC (Windows Vista, Windows 7, Windows 8)
Click on the button "Windows" of the taskbar and click on the "Control panel"

Once on the control panel, click on the "Sound"

Go to the tab "Recording"

Select your Microphone device and click on "Properties"

Go to the tab "Levels" and configure the below values : (it is possible that the option "Microphone" is not available)

Click on the tab "Enhancements" and disable all the effects (it is possible that this option is not available)

Once you have finished, click on "OK". You can now close the previously opened windows.
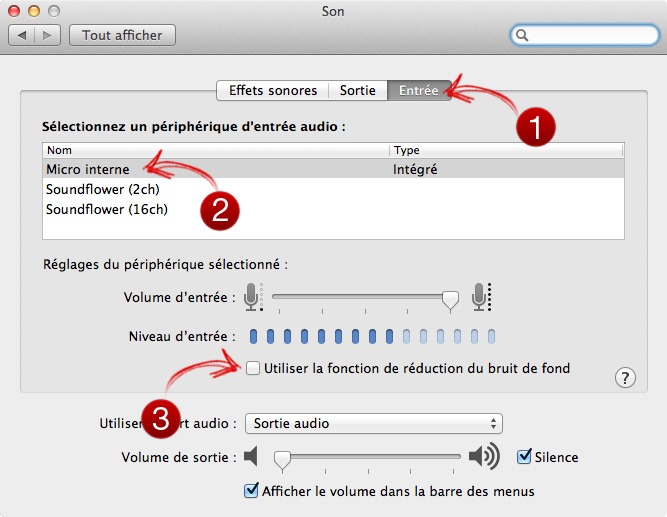
MAC (Os X)
Click on the "Apple" then on "System preferences".

Click on the icon "Sound"

Once in the parameters of the Sound,
- Go to the tab "Input"
- Select your microphone
- Disabble "Use ambient noise reduction" if active.
Check that the input level is active when you speak.

You can close the window.
Go back to the list of tutorials.